Wednesday 26 March 2014

Taster Module 8 – Colour Stitchery

A selection was made from Image 13 of the colour studies of the tree trunk on which to base my colour stitchery.

Image 35 colour stitchery colour swatch selection

Now, looking again at Image 35 just before I press the publish button, I can’t see the orange I’d seen in the paper printout used when doing my samples, so I’ve added a close up of the printout I used (Image 35A).
So that’s quite interesting: my samples are based on what an Epson printer thought the colours were!  I should have used the original colour study.

Image 35A colour stitchery colour swatch selection

A group of stranded cottons was chosen.

Image 36 thread selction

Encroaching Gobelin Stitch and three strands of stranded cotton in various colours.

Image 37 colour stitchery 1

Image 38 colour stitchery 2

Ridge Stitch and three strands of just one colour in the needle, the overlapping of the different coloured stitches merged the colours.

Image 39 colour stitchery 3

Pineapple Half Drop Stitch and up to three strands of different coloured threads in the needle.

Image 40 colour stitchery 4

Cashmere Diagonal Stitch and one strand of space dyed rayon thread.

Image 41 colour stitchery 5

Saturday 15 March 2014

Taster Module 7 – Stitchery from the Rubbings…continued

The rubbings from Section 2 were revisited and the colours in Image 7 inverted (Image 31) in Photoshop.  This had the effect of making the patterns more pronounced, clearly showing directional markings and density of colour. 

Image 31 rubbings1 inverted colour

Image 31 was then cropped to produce a section for stitchery.

Image 32 Rubbing suitable for stitching inverted

12 holes per inch canvas was painted with Koh-i-noor dyes and stitched in various types of thread in shades of grey (see Image 33),

Image 33 canvaswork sample stitches and threads named

to produce the stitchery sample from the rubbings (Image 34).

Image 34 canvaswork scan on black background

Note:

  • couching – the raffia was split lengthways in four and then twisted as it was couched to give glimpses of its shiny side
  • darning/weaving – worked to mirror the directional marks and density of the rubbings
  • additional raffia has been woven through the darning to catch the light and give extra interest
  • curling ribbon – worked flat and twisted to give added interest and height.  Blanket stitch has been worked over the ribbon in some places, as in or nue, so glimpses of it may appear through the stitching
  • use of irregular composite stitches over regular canvas stitches to build up layers.

Wednesday 5 March 2014

Taster Module 7 – Stitchery from the Rubbings – work in progress

In section 6, one of the yarns used in the samples was bought paper yarn. As the design source for this module was a tree, I wanted to explore the possibility of making my own paper yarn from papers which would otherwise be recycled. 

This YouTube video looked straightforward:
http://www.youtube.com/watch?v=jKAnC1cW6zA

Cutting half inch strips from The Saturday Telegraph I started to spin the strips using a spinning wheel, with no success.  A very knobbly yarn formed that wouldn’t wind onto the bobbin and kept breaking (Image 30).  Perhaps this was because I was using a wheel and not a spindle, as in the video, as the wheel puts more pressure on the yarn being spun.  Note the bursts of colour in the yarn – Gardening Section=bursts of colour: Financial Section=black and white.

Image 30 first unsuccessful spinning paper yarn

Not put off I found the following blog:
http://mademoisellechaos.blogspot.co.uk/2010/04/how-to-make-yarn-or-seed-tape-from-old.html
Moisture, it seems, was the key to success.  Image 31 shows the spun yarn winding on to the bobbin.  Very exciting.

Image 31 newpaper yarn on bobbin

After spinning strips from The Telegraph, I tried white tissue paper and the brown paper used by Amazon for packing, both successfully. 
The tissue when moist was very delicate and had to be handled with great care or it just ripped before it could be spun.  Perhaps it was too moist.  Once spun it became stronger.
All three yarn samples, The Telegraph, tissue and brown paper were then painted with Koh-i-noor watercolours.  All yarns took the paint well.

mage 32 painted paper yarn samples

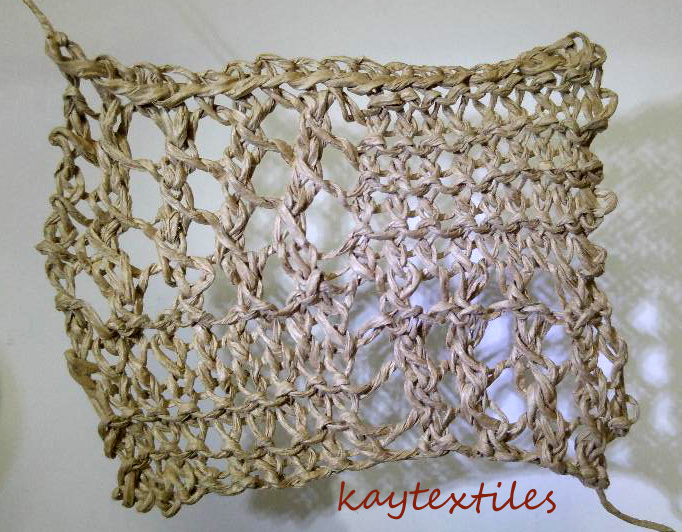
I then sampled how the yarns handled in an attempt to produce a raised darning stitch. When using the newspaper yarn and a canvas gauge of 12 holes to the inch, due to my lap looking as though it was snowing almost as soon as I started sewing it was obvious early on that it shredded easily.  The yarn spontaneously broke as I pulled it through the canvas soon after.  It was breaking by the needle as though the friction of being pulled through the canvas at this point was too great. I persevered and produced a small warp through which I wove a tissue yarn weft.
The tissue yarn was much more forgiving and so in my second sample I used it as the warp and the newspaper yarn as the weft, so putting it under less pressure.
In an attempt to make the newspaper yarn more robust I treated it with:
  • acrylic wax – made the yarn less flexible and it still broke easily
  • olive oil – darken the yarn, irreversibly it would appear, also made it swell and very fragile
  • beeswax – ran the yarn through a block of beeswax, as in goldwork/patchwork.  Made yarn easier to sew but still fragile.
  • PVA – strengthened the yarn.  Best result.
Ideas to try with newspaper yarn:
  • canvas with larger holes so less friction
  • larger eyed needle so less pressure on thread at this point
  • spin narrower strips
  • tear the ends of the strips at an angle before spinning so less bulk at join.

Image 33 paper yarn sketchbook 1

Image 34  paper yarn sketchbook 2

To be continued…

Saturday 1 March 2014